
以前Centos7.5環境のhttpd+http/2対応サーバ構築を掲載しましたが、Centos8ではミドルウエアが刷新されPHP7.2やhttpd2.4.37となり標準でHTTP/2 や TLS1.3対応となり標準環境でも構築しやすくなっています。
改めて、Centos8でのWebサーバ構築(http/2対応)の構築手順を掲載します。
Centos7の構築方法は以下と参照ください。HTTP/2についても説明も記載していますのでよければご覧ください。
CentOS7.5 Webサーバ構築 HTTP/2でWebサイトを高速化
tech-initiatives.jp/blog/http2_centos75/
作業について
以下の作業はroot権限で作業しています。root権限以外で作業する場合はsudoを付けるなど読み替えてください。また、Centos8からyumコマンドからdnfコマンドに変更されています。
yumコマンドも利用できますが内部的にはdnfコマンドで実行されるようになっています。
標準パッケージのhttpdは削除
httpdがインストールされている場合は削除しておきます。
インストールされているか確認
# dnf list installed | grep httpd
# dnf list installed | grep php
インストールされていたらhttpdとphpを削除
# dnf remove httpd*
# dnf remove php*
httpdとPHPの必要パッケージを追加
PHPを使用する場合は、httpdと一緒にインストールしておきます。
# dnf install php php-fpm php-json php-zip php-xml php-devel php-gd php-mbstring php-mysqlnd php-pdo httpd libnghttp2 mod_proxy_html mod_session mod_ssl
仮想ドメイン設定と証明書設定
# vi /etc/httpd/conf.d/vhosts.conf
以下内容を記載
ドキュメントルートやログのディレクトリは適宜作成してください。
また、SSL証明書や秘密鍵も適宜配置してください。
<VirtualHost *:80>
ServerName example.com
Protocols h2 h2c http/1.1
ServerAdmin root@localhost
DocumentRoot var/www/vhosts/example_com/html
ErrorLog /var/www/vhosts/example_com/log/error_log
CustomLog /var/www/vhosts/example_com/log/access_log combined
<Directory "/var/www/vhosts/example_com/html">
Options FollowSymLinks ExecCGI
AllowOverride All
allow from all
Options +Indexes
</Directory>
</VirtualHost>
<VirtualHost *:443>
ServerName example.com:443
Protocols h2 h2c http/1.1
ServerAdmin root@localhost
DocumentRoot /var/www/vhosts/example_com/html
ErrorLog /var/www/vhosts/example_com/log/ssl_error_log
CustomLog /var/www/vhosts/example_com/log/ssl_access_log combined
SSLCertificateFile /etc/pki/tls/certs/example_com.crt
SSLCertificateKeyFile /etc/pki/tls/private/example_com.key
SSLCACertificateFile /etc/pki/tls/certs/example_com.ca-bundle
<Directory "/var/www/vhosts/example_com/html">
Options FollowSymLinks ExecCGI
AllowOverride All
allow from all
Options +Indexes
</Directory>
</VirtualHost>
httpd起動時にpass phrasesを求められないように設定
以下内容を記載
Apacheでの、パスフレーズ入力なしでの起動方法を設定します。
以下を実行してパスフレーズを求められたらCSRを発行した際に作成した、秘密鍵のパスフレーズを入力します。
# cd /etc/pki/tls/private/
# openssl rsa -in example_com.key.pem -out example_com.key
mod_deflateでコンテンツを圧縮してサイトを高速化
圧縮設定はしなくても良いのですが、Webフォント利用などでデータも大きくなるので少しでも容量を抑えたいです。
10%~20%くらいは容量が減らせるので意外とページ読み込み速度の効果が出ます。
以下のファイルを作成します。
# vi /etc/httpd/conf.d/deflate.conf
以下内容を記載
<IfModule mod_deflate.c>
#mod_deflateを有効化
SetOutputFilter DEFLATE

#圧縮レベルを指定
DeflateCompressionLevel 1

#古いブラウザは圧縮対象から除外
BrowserMatch ^Mozilla/4\.0[678] no-gzip
BrowserMatch ^Mozilla/4 gzip-only-text/html
BrowserMatch \bMSI[E] !no-gzip !gzip-only-text/html

# jpg、gif、ZIPファイルは圧縮対象から除外
SetEnvIfNoCase Request_URI\.(?:gif|jpe?g|png)$ no-gzip dont-vary
SetEnvIfNoCase Request_URI _\.utxt$ no-gzip
</IfModule>
【注記】
DeflateCompressionLevelは.htaccessでは設定できません。
.htaccessで圧縮レベル「DeflateCompressionLevel」を指定すると500 Internal Server Errorになります。
security.conf 追記
基本的なセキュリティ設定を行います。
以下のファイルを作成します。
# vi /etc/httpd/conf.d/security.conf
以下内容を記載
# バージョン情報の隠蔽
ServerTokens Prod
Header unset "X-Powered-By"
# httpoxy 対策
RequestHeader unset Proxy
# クリックジャッキング対策
Header append X-Frame-Options SAMEORIGIN
# XSS対策
Header set X-XSS-Protection "1; mode=block"
Header set X-Content-Type-Options nosniff
# XST対策
TraceEnable Off
ウェルカム画面を無効化
デフォルトで表示されるウェルカム画面を無効にするために。welcome.confは削除またはリネームします。
# mv /etc/httpd/conf.d/welcome.conf /etc/httpd/conf.d/welcome.conf_Off
httpdの起動と自動起動設定
# systemctl start httpd
# systemctl enable httpd
OS設定
ネットワーク上にFirewallが設置されている場合は、firewalldを停止して自動機能を停止します。
VPSなどOS付属のFireplace Wall(ipable)を使用している場合は停止せずに設定する必要があります。
# systemctl stop firewalld
# systemctl disable firewalld
SE Linuxも無効化
# vi /etc/selinux/config

SELINUX=enforcing
↓ disabled に変更
SELINUX=disabled
動作確認
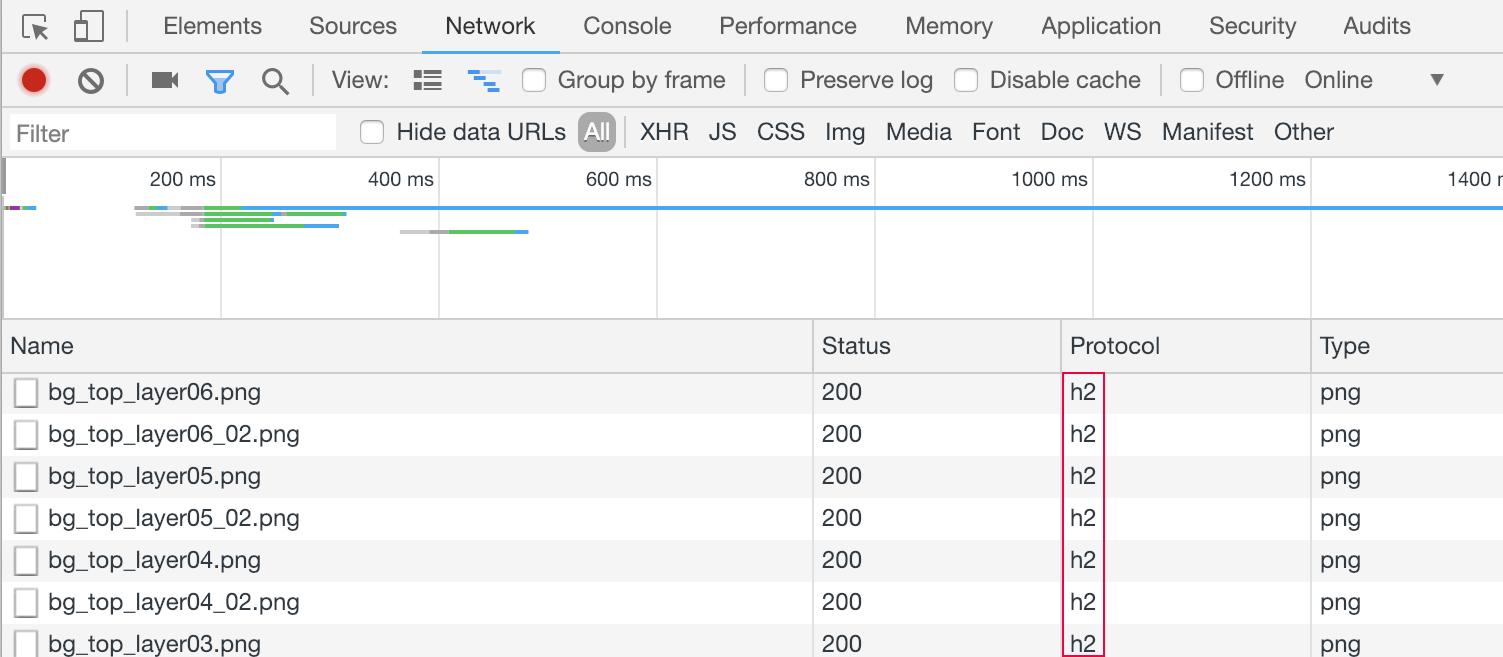
Chromeのdeveloperツールを開きnetoworkタブのprotocolが「h2」になっていることを確認します。
以上で、設定は完了となります。